Jira issues
Turn a cost anomaly, orphaned or oversized resource, posture finding, expiring credential, or failed probe into a tracked Jira issue, with the issue link kept on the finding.
Infrawrench detects a lot of things a human has to act on: spend anomalies, resources nobody is using, machines twice the size they need to be, security posture findings, credentials about to expire, probes that keep failing. Left alone, all of that lives in Infrawrench and nowhere else — which means it competes for attention with whatever is already in your tracker, and usually loses.
Connect Jira and any of those findings becomes a real issue in your team’s backlog, in one click. The link is kept on the finding, so the row shows the issue key from then on instead of offering to file it again.
If your backlog lives in Linear instead — or as well — see Linear issues. The two trackers work side by side: an organization with both connected chooses the tracker each time it files, and a finding filed to both shows both issue links.
What can be filed
| Finding | Where it lives |
|---|---|
| Cost anomaly | Cost anomaly alerts — the Anomalies table on the Costs panel |
| Orphaned resource | Orphan finder — Potential savings |
| Oversized resource | Right-sizing — the Oversized section |
| Posture finding | Posture checks |
| Expiring credential | Expiry radar |
| Failed probe | Synthetic probes |
Each one prefills the issue for you: a summary naming the finding, and a description carrying the numbers behind it — the day and the baseline for an anomaly, the current and recommended size for an oversized machine, the rule and severity for a posture finding — plus a link back into Infrawrench. Everything is editable before you file, because the sentence worth adding is usually “this is the one paging us”.
Setting it up
Jira is connected once per organization, under Settings → Jira. You need three things.
Your site URL — the address you sign in at, like https://your-company.atlassian.net.
Pasting a board or issue URL works too; only the site part is kept. Infrawrench only accepts
Atlassian Cloud addresses (.atlassian.net, or .jira.com for older sites).
An Atlassian account email — the account issues will be created as.
An API token — create one at id.atlassian.com → Security → API tokens. Use a token, not your password; Atlassian has deprecated passwords for API access.
Press Verify and Infrawrench makes one authenticated call to Jira and tells you which account answered. Do this before you rely on it — a mistyped email or a revoked token otherwise stays invisible until the first time somebody tries to file something.
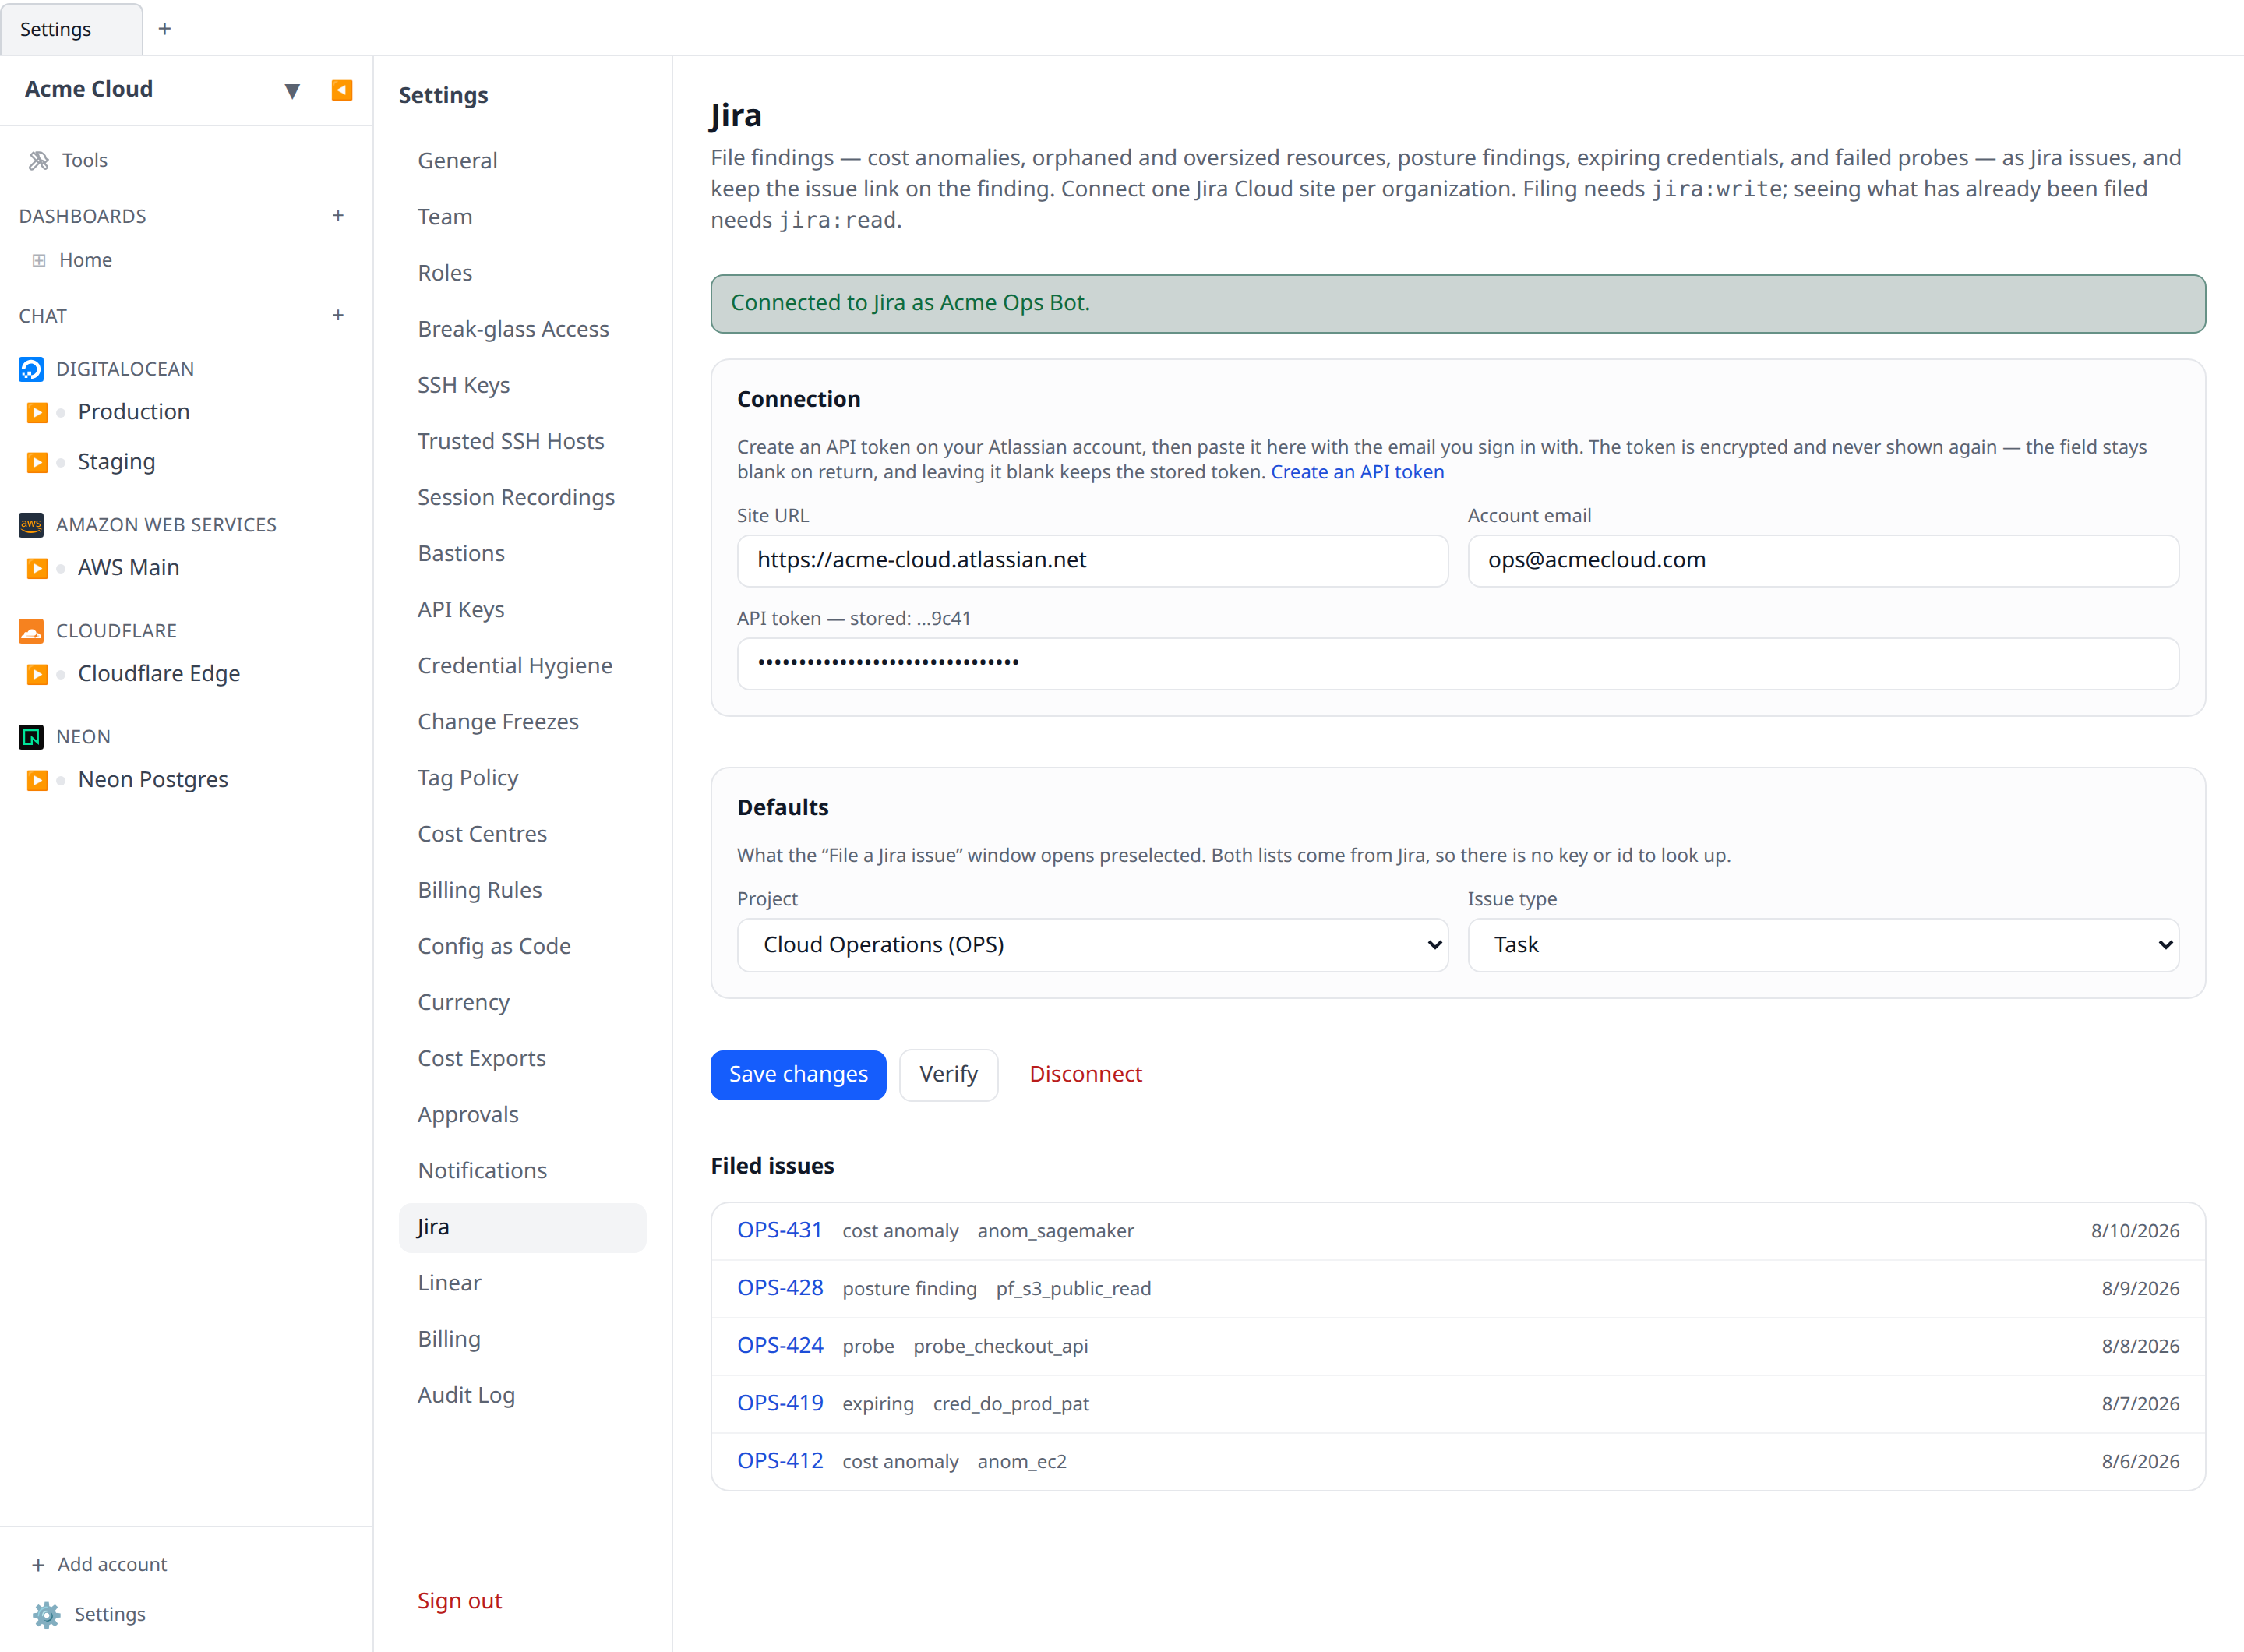
The token is encrypted before it is stored and is never sent back to any client — the settings page shows only the last few characters of it. Leaving the token field blank when you save keeps the stored one, so you can change the default project without re-pasting the token.
Defaults
Pick a default project and issue type and the file-issue window opens with them already selected. Both are dropdowns filled from your Jira site: there is no project key or issue type id to look up, and no way to typo one.
The issue type list is the one that project actually accepts, not a global list — a type that project’s scheme does not have would be rejected by Jira at creation time. Subtasks are left out, since a subtask needs a parent issue and a finding has none.
Permissions
Two permissions control this, and they are deliberately split:
jira:read— see whether Jira is connected, and see which findings have already been filed. Members have this by default. Without it, the “already filed” markers would be invisible to most of the team, which is exactly how a finding gets filed twice.jira:write— connect or disconnect Jira, and file issues. Owners and admins have this; members do not, because filing writes into a third-party tracker under the organization’s single shared Atlassian credential and cannot be undone from Infrawrench.
If you want your engineers filing their own findings, grant jira:write to members through a
custom role.
The file button only appears when Jira is connected and you hold jira:write. If you
cannot see it, one of those two is missing.
There is a second gate you also control: the Atlassian account behind the API token needs Browse Projects and Create Issues on the project being filed into. If it does not, Jira refuses and Infrawrench shows you Jira’s own explanation rather than a bare error.
Already filed
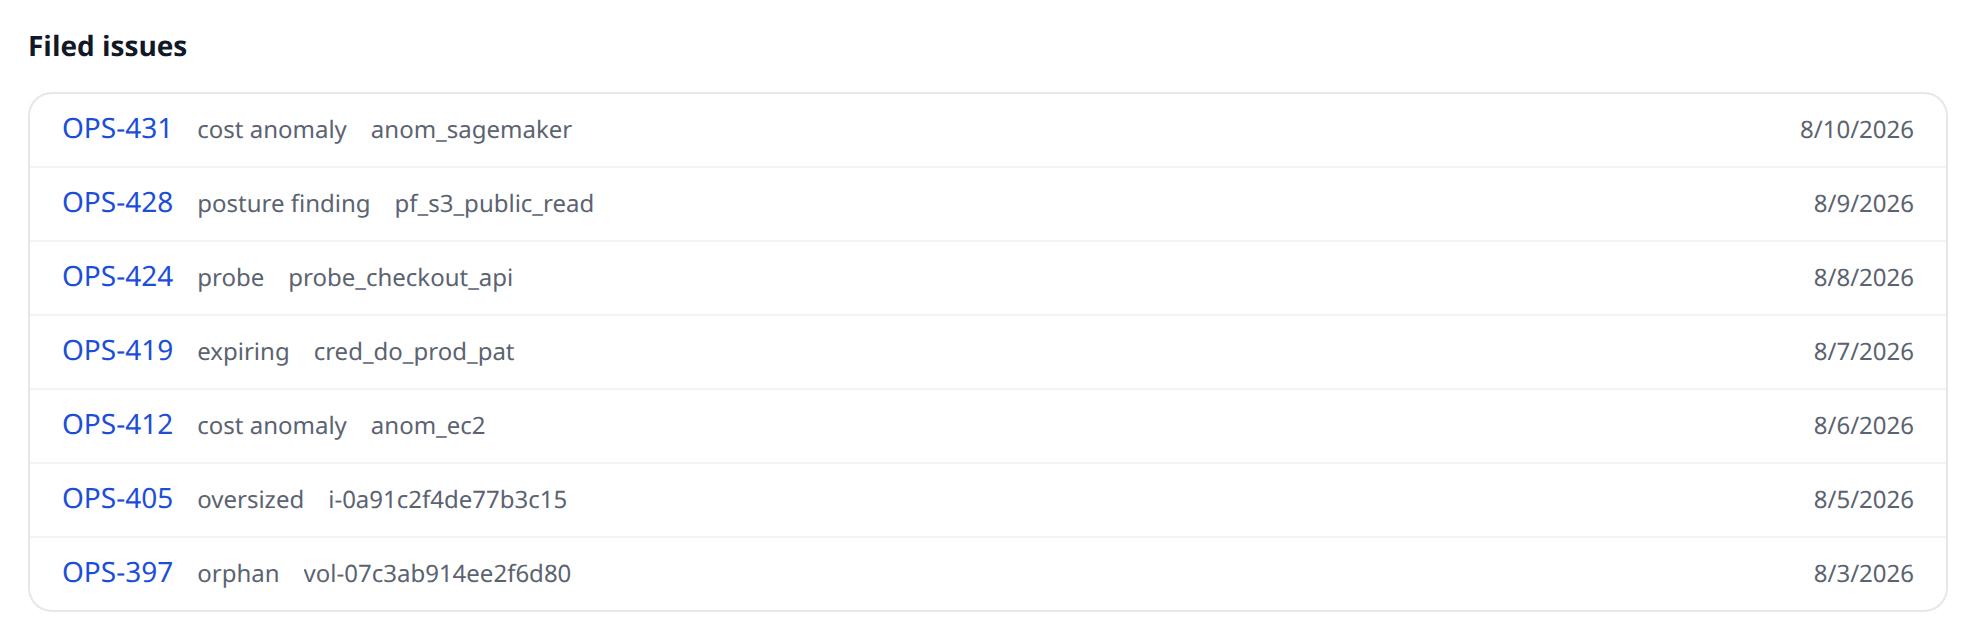
Once a finding has been filed, its row shows the issue key and links straight to the issue in Jira instead of offering the button again. Disconnecting Jira does not erase these — the links are kept, so a reconnection picks up where you left off.
Settings → Jira also lists everything filed from this organization, newest first.
Desktop and mobile
Desktop works exactly as the web app does: the same Settings → Jira section, and the same file button on the Costs, Savings, and Posture tabs when you are signed in to a cloud organization. Local (non-cloud) mode has no organization to file on behalf of, so the button does not appear.
Mobile shows the issue key on an anomaly that has already been filed, and lets you file a new one from the anomaly row with a native sheet — including the project and issue type pickers. Connecting Jira in the first place is done from the web or desktop app; entering a site URL and an API token on a phone is not a good use of a phone.
Audit trail
Every change is recorded in the audit log:
jira.configure when the connection is saved, jira.delete when it is removed, and
jira.issue.create for each issue filed, naming the finding and the resulting issue key. The
API token never appears in any of them.
Issues are created by the one Atlassian account behind the token, so Jira attributes them all to that account — Infrawrench’s audit log is where you see which person actually filed which issue.